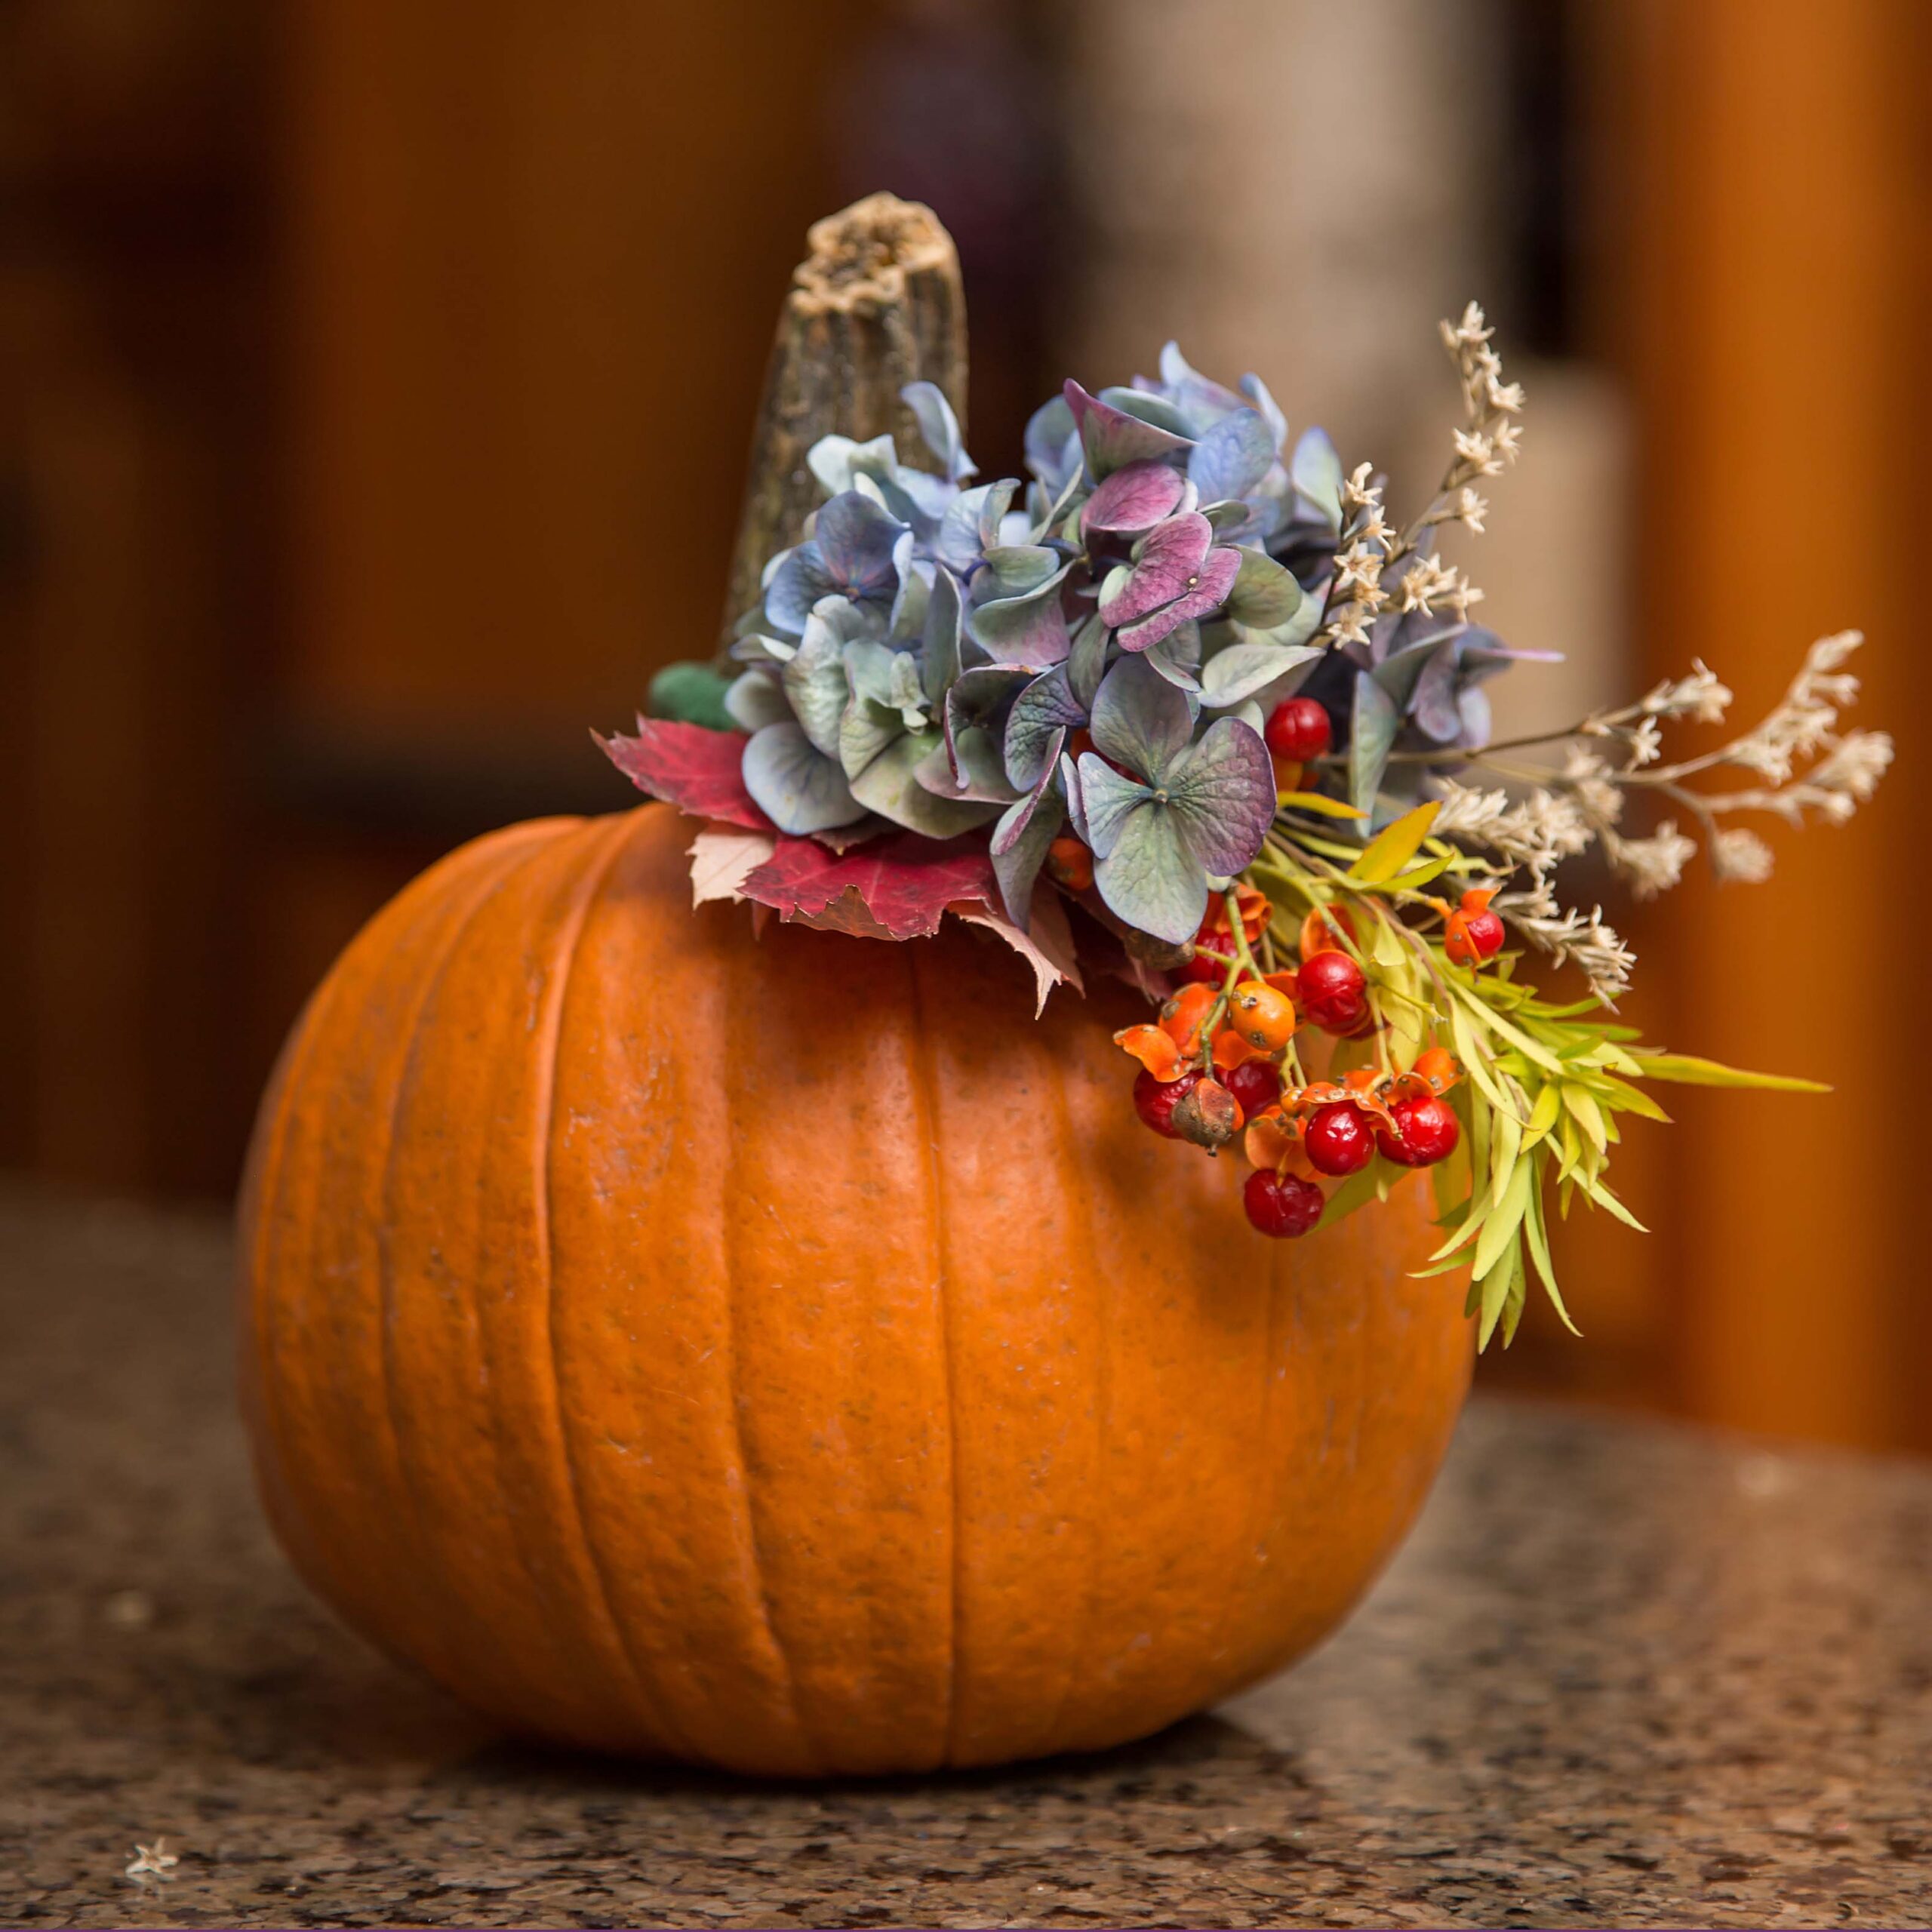
Create a beautiful DIY pumpkin centerpiece with fresh flowers in just a few simple steps. Transform a pumpkin into a stunning centerpiece by hollowing it out, filling it with water, and arranging your favorite flowers inside. Diy Pumpkin Centerpiece With Fresh Flowers, let’s explore
It’s an easy and budget-friendly way to add a touch of fall to your home decor. Whether you’re hosting a dinner party or want to spruce up your dining table, this DIY project is sure to impress your guests. With the natural and rustic element of the pumpkin combined with the vibrant colors of the flowers, this centerpiece will bring warmth and charm to any space.
Follow these steps to create your own stunning pumpkin centerpiece with fresh flowers.
Choosing The Perfect Pumpkin
Discover the art of selecting an ideal pumpkin for your DIY centerpiece, paired with fresh flowers. Uncover tips for finding the perfect shape, size, and color to create a stunning centerpiece for your home or event. Embrace the beauty of nature with this elegant and charming addition to your decor.
When it comes to creating a stunning DIY pumpkin centerpiece with fresh flowers, choosing the perfect pumpkin is essential. The right pumpkin can make all the difference in creating a beautiful and eye-catching centerpiece that will impress your guests. In this section, we will discuss two key factors to consider when selecting your pumpkin: size and shape, and color and texture.
Size And Shape
The size and shape of your pumpkin will greatly impact the overall look of your centerpiece. Consider the table or space where you plan to display your centerpiece, and choose a pumpkin that fits proportionally. A larger pumpkin will make a bold statement, while a smaller one can create an intimate and charming ambiance.
If you prefer a round and symmetrical centerpiece, look for a pumpkin with a round shape. This shape is perfect for creating a classic and elegant look. On the other hand, if you want to add a bit of uniqueness to your centerpiece, opt for a pumpkin with a more irregular or oblong shape. This will add character and visual interest to your arrangement.
Color And Texture
The color and texture of your pumpkin can further enhance the beauty of your centerpiece. Pumpkins come in a variety of colors, such as orange, white, and even multicolored. Consider the color scheme of your event or the room where you plan to display the centerpiece, and choose a pumpkin that complements the surroundings.
In addition to color, pay attention to the texture of the pumpkin’s skin. Some pumpkins have a smoother and shinier skin, while others have a rougher and more textured surface. The texture can add depth and visual interest to your centerpiece, especially when combined with the softness of fresh flowers.
Remember, choosing the perfect pumpkin for your DIY centerpiece is a crucial step in creating a stunning and memorable arrangement. By considering factors such as size and shape, as well as color and texture, you can ensure that your centerpiece stands out and adds a touch of elegance to your home or event.
Gathering Your Materials
Gather your materials for a delightful DIY pumpkin centerpiece adorned with fresh flowers, bringing a touch of natural beauty to your home decor.
Gathering Your Materials Fresh Flowers To create a stunning DIY pumpkin centerpiece with fresh flowers, you’ll need a few essential materials. First and foremost, you’ll want to gather an assortment of fresh flowers that will complement the colors of your pumpkin. Opt for blooms in rich fall hues such as orange, yellow, red, and deep purple. Roses, dahlias, chrysanthemums, and sunflowers are all excellent choices for this project. Floral Foam Next, you’ll need a block of floral foam to provide stability and hydration for your fresh flowers. Floral foam can easily be found at your local craft store or online. Make sure to choose a block that is large enough to fit inside your pumpkin yet small enough to leave room for the flowers. The foam will help prolong the lifespan of your arrangement by allowing the flowers to absorb water. Knife or Pumpkin Carving Tools To prepare your pumpkin for the centerpiece, you’ll need a knife or pumpkin carving tools. The tool you choose will depend on your comfort level and the intricacy of the design you plan to create. A sharp knife will suffice for simple cuts, but if you wish to carve elaborate patterns or shapes, pumpkin carving tools like scoops and saws may be more suitable. Once you’ve gathered these materials, you’ll be ready to bring your DIY pumpkin centerpiece to life. In the following sections, we will walk you through the step-by-step process of putting fresh flowers in a pumpkin and filling it with floral foam. Let’s dive in and get creative with nature’s vibrant beauty and the cozy spirit of autumn!
Preparing The Pumpkin
Discover how to create a stunning DIY pumpkin centerpiece with fresh flowers. This step-by-step guide will show you the best techniques for preparing the pumpkin to showcase your beautiful floral arrangement.
Removing The Top
Before you can create a beautiful pumpkin centerpiece with fresh flowers, you’ll need to prepare the pumpkin. Start by removing the top of the pumpkin, just like you would when carving a pumpkin for Halloween. Use a sharp knife to carefully cut around the stem and create a lid. Make sure the opening is large enough to comfortably fit your hand inside for the next step.
Cleaning The Interior
Once you’ve removed the top, it’s time to clean the interior of the pumpkin. Reach inside the pumpkin with your hand and scoop out all the seeds and pulp. You can use a spoon or a small pumpkin carving tool to scrape the sides and bottom of the pumpkin and remove any remaining stringy fibers. Make sure to thoroughly clean the interior, as any leftover seeds and pulp can cause the fresh flowers to deteriorate more quickly.
How do you put fresh flowers in a pumpkin? Now that your pumpkin is ready, fill it with water. Depending on the size of your pumpkin, you may need to resize a small container and place it inside the pumpkin to hold the water. This will ensure that your fresh flowers stay hydrated throughout your centerpiece’s lifespan.
How do you fill pumpkins with flowers? After filling the pumpkin with water, it’s time to arrange your fresh flowers. Trim the stems of your flowers to the appropriate length and insert them into the water-filled pumpkin. You can create a beautiful mixed arrangement using a variety of flowers, or stick to a monochromatic color scheme for a more elegant look. Play around with different heights and textures to achieve the desired effect.

Credit: www.cottageonbunkerhill.com
Arranging The Fresh Flowers
Once you have soaked the floral foam and created the base for your pumpkin centerpiece, it’s time to bring in the star of the show – the fresh flowers. Here’s a step-by-step guide on how to insert the flowers into the pumpkin, ensuring a stunning result that will impress your guests.
Soaking The Floral Foam
Before diving into the arrangement process, it is crucial to prep the floral foam properly. Soaking the foam allows it to absorb water and keep the flowers hydrated throughout your event. Follow these simple steps:
- Take a container large enough to accommodate the floral foam and fill it with enough water to submerge the foam.
- Gently place the foam into the water and let it soak for about 5 minutes.
- Once the foam is fully saturated, remove it from the water and let any excess water drain off.
Creating The Base
Now that your floral foam is ready, it’s time to create a sturdy base for your flower arrangement inside the pumpkin. Follow these steps:
- Choose a pumpkin that is wide enough to fit the floral foam and has a stable base to hold the arrangement.
- Using a sharp knife or pumpkin carving tools, carefully cut off the top of the pumpkin, creating a wide opening.
- Remove the pumpkin seeds and pulp from the inside, ensuring a clean and hollow space for the flowers.
- Place the soaked floral foam into the bottom of the pumpkin, pressing it down gently to secure it.
Inserting The Flowers
Now comes the fun part – inserting the fresh flowers into the pumpkin centerpiece. Follow these steps to achieve a balanced and visually appealing arrangement:
- Begin by choosing the flowers you want to include in your centerpiece. Opt for a mix of colors, shapes, and sizes for a vibrant and dynamic look.
- Trim the flower stems at an angle, about 1-2 inches from the bottom, using sharp floral shears. This will help the flowers absorb water better.
- Start inserting the flowers into the floral foam, focusing on the center and working your way towards the outer edges. This will create a balanced and symmetrical arrangement.
- Vary the heights of the flowers to add dimension and visual interest. Place taller blooms in the center and shorter ones towards the edges.
- Fill any gaps between the flowers with foliage or smaller blooms, ensuring a lush and full arrangement.
- Keep the flowers hydrated by periodically adding water to the floral foam. This will help them stay fresh and vibrant throughout your event.
Now that you know how to put fresh flowers in a pumpkin and fill it with flowers, you’re ready to create a stunning centerpiece that will impress your guests. Follow these steps and let your creativity shine!
Adding Finishing Touches
Fresh flowers in a pumpkin make a stunning centerpiece for any fall gathering. It’s the perfect way to bridge the gap between the season’s harvest and the beauty of nature. Once you’ve arranged your fresh flowers in a pumpkin, it’s time to add the finishing touches to make your centerpiece truly stand out.
Greenery And Foliage
Enhance the look of your pumpkin centerpiece by adding a touch of greenery and foliage. Consider incorporating seasonal elements such as eucalyptus, ferns, or even small branches to create depth and texture in your arrangement. The addition of greenery can add natural elegance to your centerpiece, creating a visually appealing display.
Accents And Embellishments
Take your pumpkin centerpiece to the next level with carefully chosen accents and embellishments. Consider adding delicate floral picks, small pinecones, or berries to further complement the beauty of the fresh flowers. These subtle touches can elevate the overall look and create a sense of harmony among the various elements.

Credit: blog.jennysteffens.com
Credit: oaklynnlane.com
Frequently Asked Questions Of Diy Pumpkin Centerpiece With Fresh Flowers
What Are The Best Flowers For A Pumpkin Centerpiece?
You can use seasonal flowers like sunflowers, roses, and daisies for a vibrant centerpiece.
How Do I Make My Pumpkin Centerpiece Last Longer?
To prolong its freshness, keep the pumpkin in a cool place, change water daily, and trim the stems.
Can I Use Artificial Flowers For The Pumpkin Centerpiece?
Yes, artificial flowers can be used, but fresh flowers provide a natural and fragrant touch.
Are There Any Safety Tips For A Pumpkin Centerpiece With Candles?
Ensure the candle is secure, never leave it unattended, and consider using flameless LED candles for safety.
Conclusion
Creating a stunning DIY pumpkin centerpiece with fresh flowers is a simple yet impactful way to add charm to your autumn decor. By following these step-by-step instructions, you can embrace your creativity and bring a touch of nature into your home.
With a variety of flower options available, you can customize your centerpiece to suit any style or occasion. So, why wait? Start crafting your beautiful and unique centerpiece today!